Cart
Linear Screw Alignment | Helix Linear Engineering Guide
Linear Screw Alignment
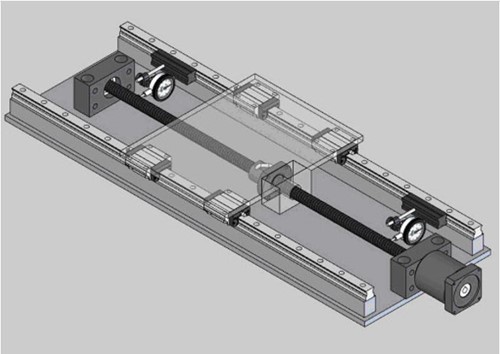
- Assemble the support bearings onto the lead. (It may be necessary to mount the flange to the carriage block first). The support bearing block should be a slight to moderate press-fit. Proper bearing installation technique is required.
- When mounting support bearings to the mounting plate, tighten fasteners only finger-tight.
- After ensuring that the mounting flange fasteners are finger-tight, manually move the carriage back and forth, cycling once or twice, before leaving the carriage at the drive end. (If possible, note the drive torque required to manually move the carriage from one end of the lead screw to the other, with both the drive end support block and non-drive end support block loosely mounted.)
- Secure the mounting flange to the carriage, tighten the fasteners per manufacturer's recommended torque.
- Move the carriage manually toward the non-driven end. With a dial indicator, check the vertical displacement of the screw and linear guides
- After shimming, tighten the fasteners for the drive end support block to manufacturer's recommended torque with the carriage closest to the drive support block.
- Repeat moving the carriage manually toward the non-drive end. With a dial indicator, check the horizontal displacement at both ends between the screw and linear guide and minimize variation.
- Tighten the fasteners for both end support blocks per fastener manufacturer's recommended torque.
- Compare the torque required to manually move the carriage from one end of the screw to the other with the torque recorded in step 3. If the lead is properly aligned, there should be no variation in driving torque.
Note: The amount of misalignment varies depending on diameter of screw, stiffness of preload, and length of screw.
Linear screws should always be supported radially and axially. They should never be used to support or guide the load. Screws are to be used as a mechanism by which torque is converted into linear motion or linear motion into torque.
IMAGE 1
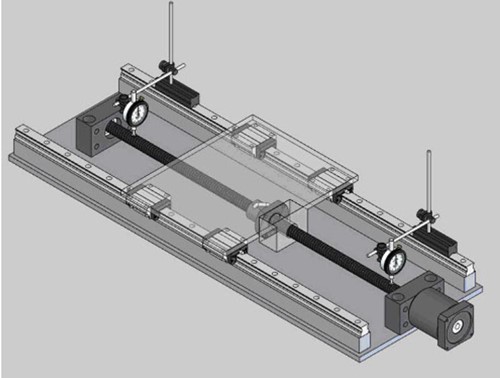
IMAGE 2